The Amiga 2000 restoration
I have have re-sparked my interest in Amiga computers again in the middle of 2022. This has been an on and off interested for the last several years actually as I had bought the Amiga forever and C64 forever from Clonto to use these machines an in emulated form. This time I expanded my interest and have been following forums along with the FS-UAE and Amiberry emulators running on MacOS.
I would watch for physical computers for sale but never enough to buy one due to to many hobbies.
When the world changed (Covid) I shuffled my hobbies around and had been looking for something that really grabbed my attention once again. I started gravitating towards Amigas and they bring a great smile when looking at them. I finally acted on this impulse...
Early 2023 I noticed there was an Amiga 2000 for sale in New Jersey and while it is not that far from the Washington, DC Metro area it is not close either. I saw this Amiga sitting there for several weeks with no one buying it. Was this the one? Do I want to drive and get it?
I was meeting a friend in Philadelphia, PA in February and decided to inquire if it was still there and do a little haggling on the price. We agreed to a price and I was provided his address so off we go!
Thing to note New Jersey is a tall state and this happened to not be in the New Jersey that was close to Philadelphia but just outside New Your City! Oh oops I misplayed but was really excited to have a physical Amiga again so I drove 2.5 hours north of Philadelphia to meet this gentleman. The interaction was good and he was very friendly. He seemed happy it was going to someone that was very excited to use it which I am. After some social time and paid him for the computer we loaded it up in my car and back to VA I went.
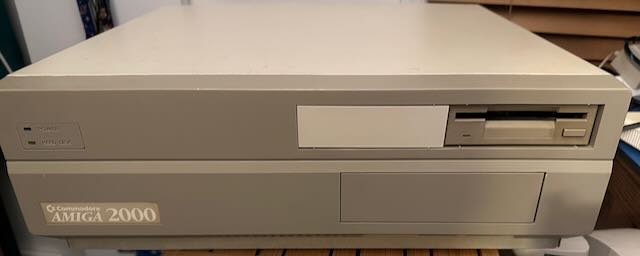
While on the way home I realized things where much later than expected but took it easy with my new Amiga and finally arrived home a little after 2 am. I promptly unloaded my Amiga 2000 and 1084s monitor and headed to bed. This was a project I was super excited about diving into.
Once I had time I took the 2000 apart to see what condition things looked like inside. The Varta, destroyer of Amiga's, was still inside but didn't seem like it leaked much.
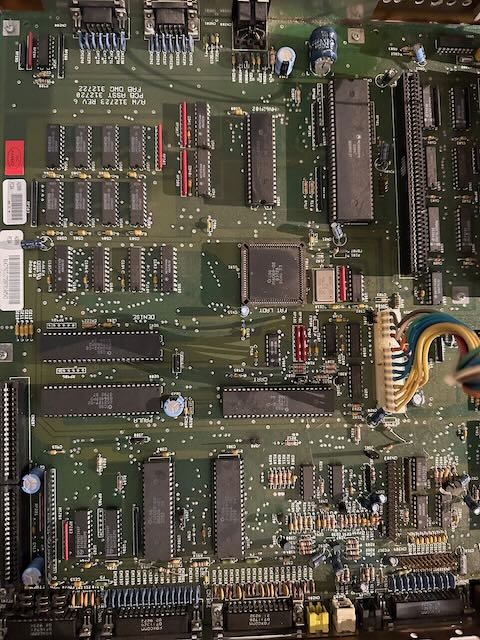
I promptly removed the Varta then soaked the area in vinegar with an IPA cleanup to neutralize battery acid and then clean up the vinegar.
I had realized I have not done any soldering in a long time so I need to practice on something I did not care if it was destroyed. A friend had given me an older motherboard to practice soldering techniques on. I had quickly realized that my old soldering iron from 20+ years ago was not going to handle the work I needed to do.
I did some research well ok way to much research and decided on a Weller WE-1010NA soldering station. I found that Microcenter had one in stock and proceeded to pick it up from them. They even price matched the much lower Amazon price I found which made me even happier about the whole thing.
Now I had a proper soldering station I was good to go right? Well not so fast excited one. I had over heated the tip of the soldering iron and oxidized it which of course was not obvious to me. After some more research I ended up buying a new tip and some stone that would help clean things.
Now it was also obvious to me I need soldering practice so I purchased a few learn to solder boards. This really helped me along with the YouTube videos to gain some skill however little it was.
Next step I tried to use braid and a suction pump to remove solder. Well this a lot harder than I had expected, at least for me. With trying to figure out what was wrong I learned that one must add solder to the solder joints to make it easier to remove the existing solder. Here is where I became somewhat frustrated with the whole process and ended up buying a Hakko FR-301 desoldering tool. The process greatly improved from this point to me and I felt the 2 month learning time was time very well spent.
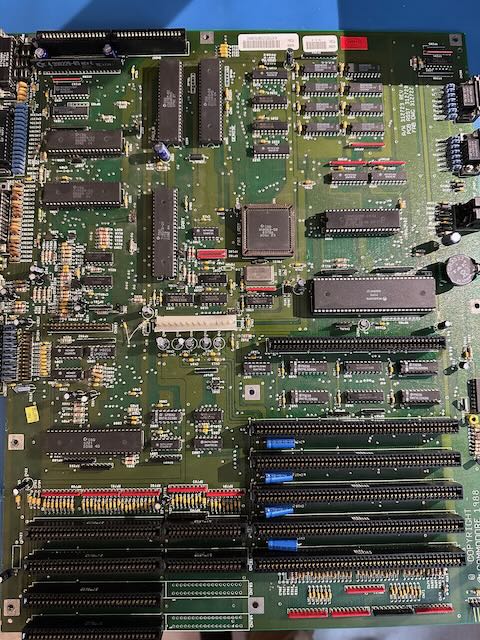
I was able to successfully remove the battery and do a complete recap of the A2000 motherboard.
While I was in this recap kick I decided to also do the power supply as it was 30+ years old! I didn't want to cut any corners now as things are almost good to go!
I was lucky that my A2000 has both a GVP 68030 accelerator along with a GVP SCSI card. Each of these cards also has 4 MB of RAM giving me a total of 9 MB for the system. The 8 MB of fast RAM along with 1 MB of chip RAM.
This particular Amiga also came with a Video Toaster and a KitchenSync TBC but I have yet to them out. Sadly the KitchenSync is missing the dongle which will make it harder to use. Both of these cards have been removed as I am not really using them right now so why run power through them.
With the upgrades I upgraded the hard drive to a SCSI to SD solution. With what I imagine is way to much research is settled on a ZuluSCSI drive which I really love for its speed and just plain ease of use.
I had also picked up a Gotek drive to use which I later put in an external drive case I picked up from some other Amiga's I purchased since this one.
Wanting an easy connection to a LCD monitor I also installed a Denise socket RGB2HDMI solution. Having HDMI connection just makes things so much easier to use. This also has given such a clear image it is just amazing.
I tore apart the floppy drive and cleaned it along with re-greasing the rail. It was amazingly dirty in there.
With all the cleaning I did it is just amazing how much dirt can accumulate after 30 years!
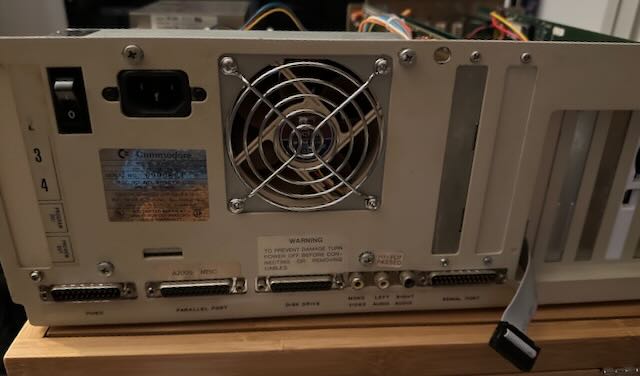
The Amiga community is great with the amount of 3D printed models that have been made. I ordered some Jessie Premium PLA Beige 500 filament to print my parts in. With this I made a card header to mount the ZuluSCSI to that has an exposed section to allow inserting the SD card without taking the case apart. This has saved so much time transferring files. Since I decided to only use one real floppy drive I had an empty spot in the case so I printed an insert to screw into the case to fill that hole. The match isn't anywhere close but it is Amiga colored so I don't care.
The back where you can see the printed card header along with the RGB2HDMI cable coming out.
This has been a great project and have since picked up a few more Amiga's that I will be refurbishing slowly as time permits. I have been very happy about returning to the Amiga world and that I can share the adventure.
I don't believe I would have been able to do this without the repair videos of Chris Edwards where I have learned so much. I am very grateful of his willingness to do what he does and share the knowledge with the community.
I ran across the Retro Hack Shack also repairing an Amiga 2000 and found his RGB2HDMI solution that he sells. This is the one I purchased and now use for my A2000.
Thank you for reading along and I hope to see you in this small Vintage Computer world.